반응형
본 내용은 인프런의 이도원 님의 강의 "Spring Cloud로 개발하는 마이크로서비스 애플리케이션(MSA)" 내용을 바탕으로 정리한 내용입니다.
의존성 추가
pom.xml
<dependency>
    <groupId>org.springframework.boot</groupId>
    <artifactId>spring-boot-starter-data-jpa</artifactId>
</dependency>
<dependency>
    <groupId>org.modelmapper</groupId>
    <artifactId>modelmapper</artifactId>
    <version>2.3.8</version>
</dependency>
<dependency>
    <groupId>jakarta.validation</groupId>
    <artifactId>jakarta.validation-api</artifactId>
    <version>2.0.2</version>
</dependency>- JPA와 관련 라이브러리와 ModelMapper를 추가한다.
JPA 관련 파일 추가 의존성 추가
UserEntity 클래스
package com.example.UserService.jpa;

import jakarta.persistence.*;
import lombok.Data;

/**
 * DB에 저장할 User 데이터
 */
@Data
@Entity
@Table(name="users")
public class UserEntity {
    @Id
    @GeneratedValue(strategy = GenerationType.IDENTITY)
    private Long id;

    @Column(nullable = false, length = 50, unique = true)
    private String email;

    @Column(nullable = false, length = 50)
    private String name;

    @Column(nullable = false, unique = true)
    private String userID;

    @Column(nullable = false, unique = true)
    private String encryptedPwd;
}- 데이터베이스에 저장할 사용자 정보를 정의한다.
UserRepository 인터페이스
package com.example.UserService.jpa;

import org.springframework.data.repository.CrudRepository;

public interface UserRepository extends CrudRepository<UserEntity, Long> {
}- CrudRepository를 상속받아 데이터베이스와 연결한다.
Dto 추가
UserDto 클래스
package com.example.UserService.dto;

import lombok.Data;

import java.util.Date;

/**
 * 데이터 이동시 사용
 */
@Data
public class UserDto {
    private String email;
    private String pwd;
    private String name;
    private String userId;
    private Date createAt;
    // 암호화된 패스워드
    private String encryptedPwd;

}- 데이터 이동 시 사용할 객체를 정의한다.
Service 추가
UserService 인터페이스
package com.example.UserService.service;

import com.example.UserService.dto.UserDto;

public interface UserService {
    UserDto createUser(UserDto userDto);
}- 비즈니스 로직의 기본 구조를 정의한다.
UserServiceImpl 클래스
package com.example.UserService.service;

import com.example.UserService.dto.UserDto;
import com.example.UserService.jpa.UserEntity;
import com.example.UserService.jpa.UserRepository;
import org.modelmapper.ModelMapper;
import org.modelmapper.convention.MatchingStrategies;
import org.springframework.beans.factory.annotation.Autowired;
import org.springframework.stereotype.Service;

import java.util.UUID;

@Service
public class UserServiceImpl implements UserService{
    @Autowired
    private UserRepository userRepository;

    @Override
    public UserDto createUser(UserDto userDto) {
        // 랜덤으로 ID 생성
        userDto.setUserId(UUID.randomUUID().toString());
        ModelMapper mapper = new ModelMapper();
        // 값들이 정확히 같을 때만 엔티티 클래스로 변환하도록 설정
        mapper.getConfiguration().setMatchingStrategy(MatchingStrategies.STRICT);
        UserEntity userEntity = mapper.map(userDto, UserEntity.class);
        userEntity.setEncryptedPwd("EncryptedPwd");

        userRepository.save(userEntity);

        UserDto returnUserDto = mapper.map(userEntity, UserDto.class);

        return returnUserDto;
    }
}- 사용자 생성 로직을 구현한다.
VO 추가
RequestUser
package com.example.UserService.vo;

import lombok.Data;

import javax.validation.constraints.NotNull;
import javax.validation.constraints.Size;


/**
 * 화면에서 받아오는 정보
 */
@Data
public class RequestUser {
    @NotNull(message="Email cannot be null") // Null 입력시 메시지 표시
    @Size(min=2, message = "Email not be less than two characters") // 두글자 이상 입력
    private String email;

    @NotNull(message="Email cannot be null")
    @Size(min=2, message = "Email not be less than two characters")
    private String name;

    @NotNull(message="Email cannot be null")
    @Size(min=8, message = "Email not be less than two characters")
    private String pwd;
}- 클라이언트로부터 요청받을 데이터를 정의한다.
ResponseUser
package com.example.UserService.vo;

import lombok.Data;

/**
 * 반환시 사용할 vo
 */@Data
public class ResponseUser {
    private String email;
    private String name;
    private String userId;
}- 클라이언트로 반환할 데이터를 정의한다.
Conroller 수정
UserController 클래스
package com.example.UserService.controller;

import com.example.UserService.dto.UserDto;
import com.example.UserService.service.UserService;
import com.example.UserService.vo.RequestUser;
import com.example.UserService.vo.ResponseUser;
import org.modelmapper.ModelMapper;
import org.modelmapper.convention.MatchingStrategies;
import org.springframework.beans.factory.annotation.Autowired;
import org.springframework.http.HttpStatus;
import org.springframework.http.ResponseEntity;
import org.springframework.web.bind.annotation.*;

@RestController
@RequestMapping("/")
public class UserController {
    private UserService userService;

    @Autowired
    public UserController(UserService userService){
        this.userService = userService;
    }

    @PostMapping("/users")
    public ResponseEntity<ResponseUser> createUser(@RequestBody RequestUser user){
        ModelMapper mapper = new ModelMapper();
        mapper.getConfiguration().setMatchingStrategy(MatchingStrategies.STRICT);

        UserDto userDto = mapper.map(user, UserDto.class);
        userDto = userService.createUser(userDto);

        ResponseUser responseUser = mapper.map(userDto, ResponseUser.class);
        // 정상처리 시 201번 코드를 반환해야 한다.
        return ResponseEntity.status(HttpStatus.CREATED).body(responseUser);
    }
}- 사용자 정보를 View 받아오고 비즈니스 로직을 호출한다.
회원가입 결과 테스트(postman)
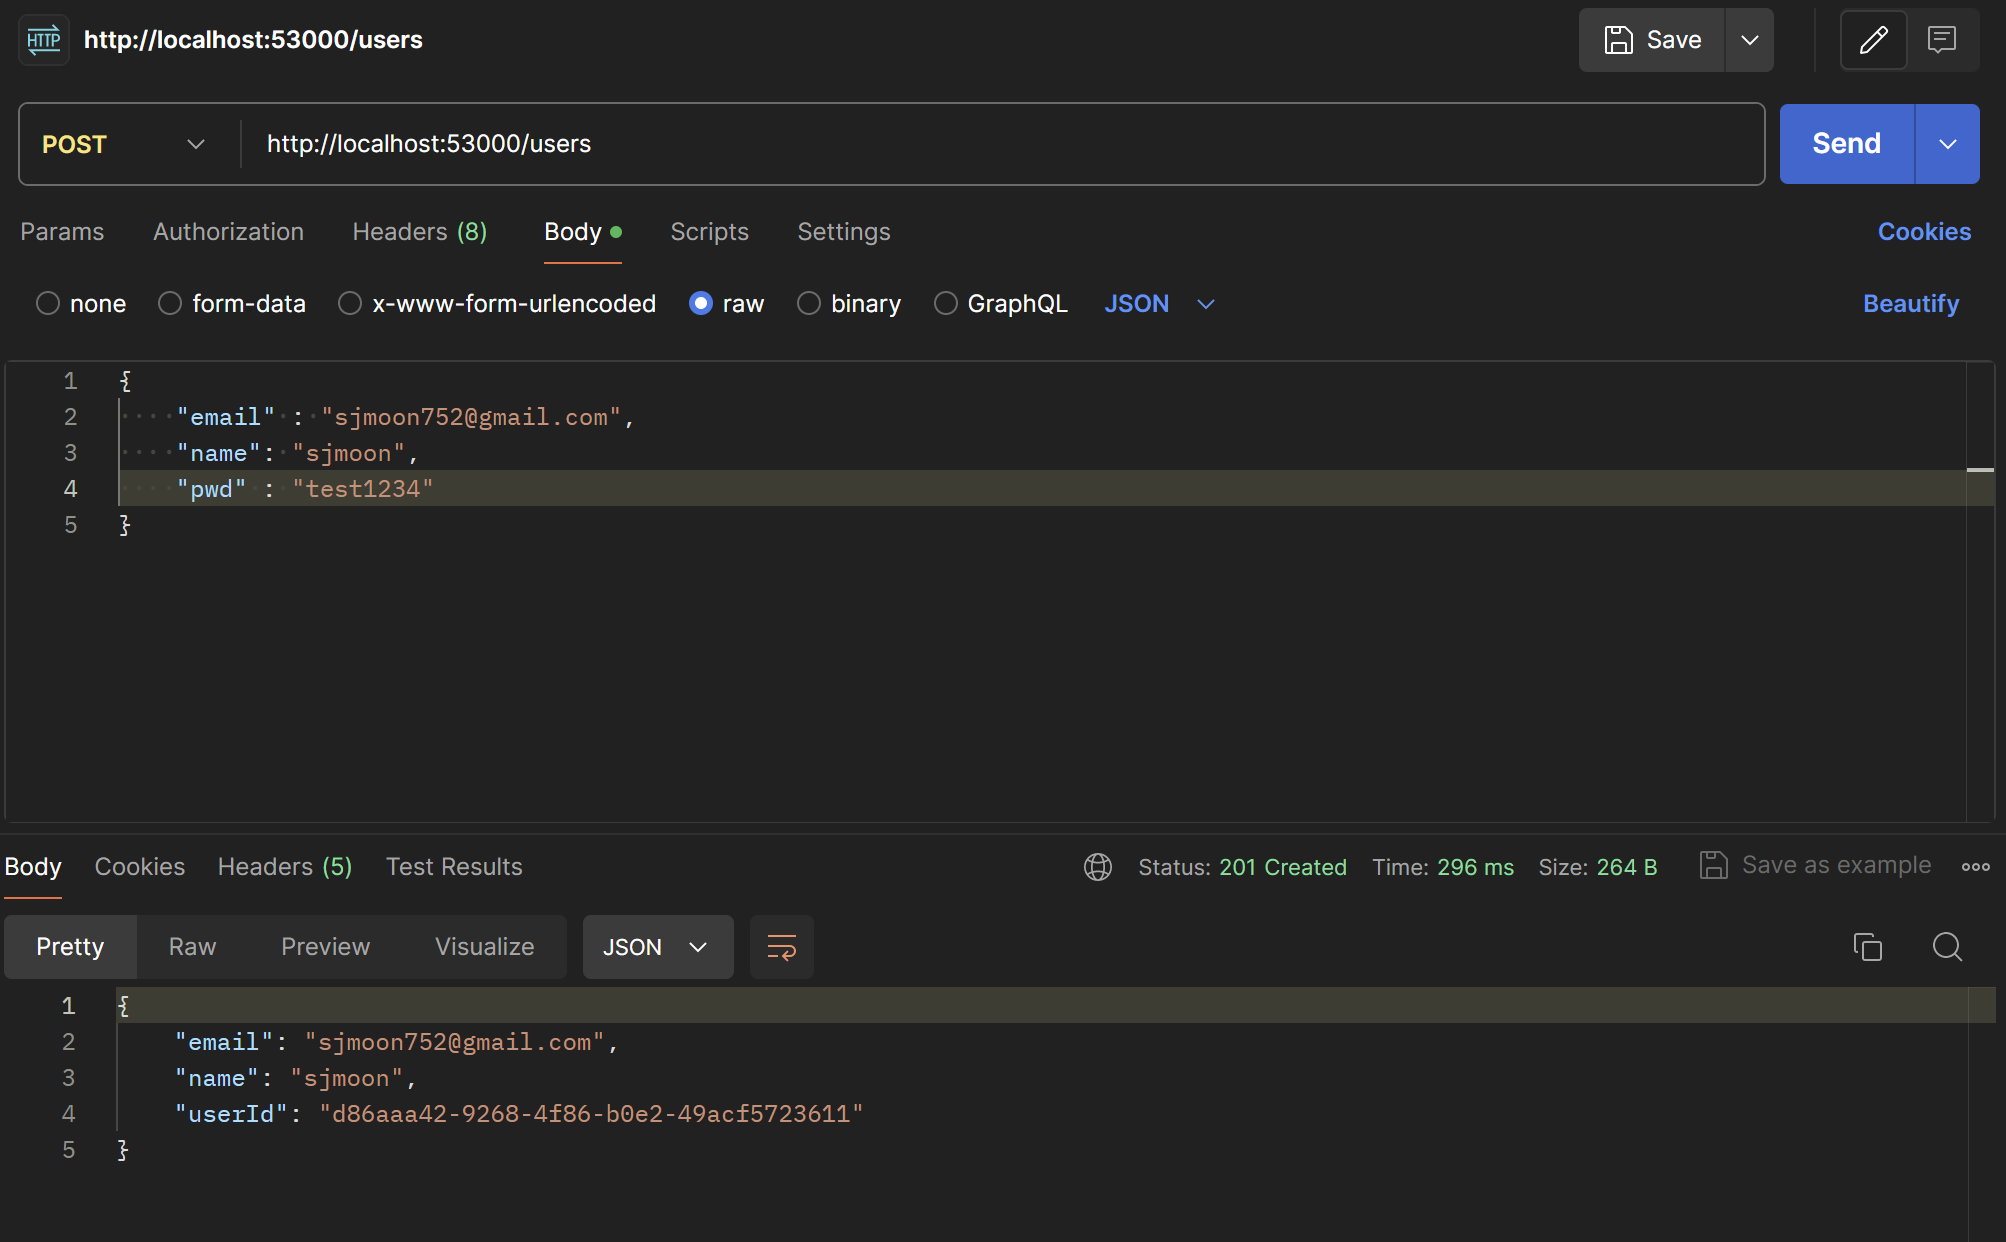
- Body > raw > JSON 형태로 데이터를 입력하고 http://localhost:포트번호/users 로 POST 요청을 보낸다.
- Status가
201 Created로 나오면 성공한 것이다
반응형
'Cloud > MSA' 카테고리의 다른 글
| [MSA] MicroService 구현(사용자 서버 기능 추가) (0) | 2024.11.26 |
|---|---|
| [MSA] MicroService 구현(Spring Security) (0) | 2024.11.26 |
| [MSA] MicroService 구현(사용자 서비스) (0) | 2024.06.29 |
| [MSA] Gateway Filter (0) | 2024.06.29 |
| [MSA] Spring Cloud Gateway (0) | 2024.06.29 |